Workspace
The Workspace is where you make images and videos. A toolbar picks the model, the sidebar holds Compose and Settings with Generate at its foot, the middle shows the running job and the latest result, and the Gallery strip runs under it. Audio has its own page. How to make things is in Make images and Make video.
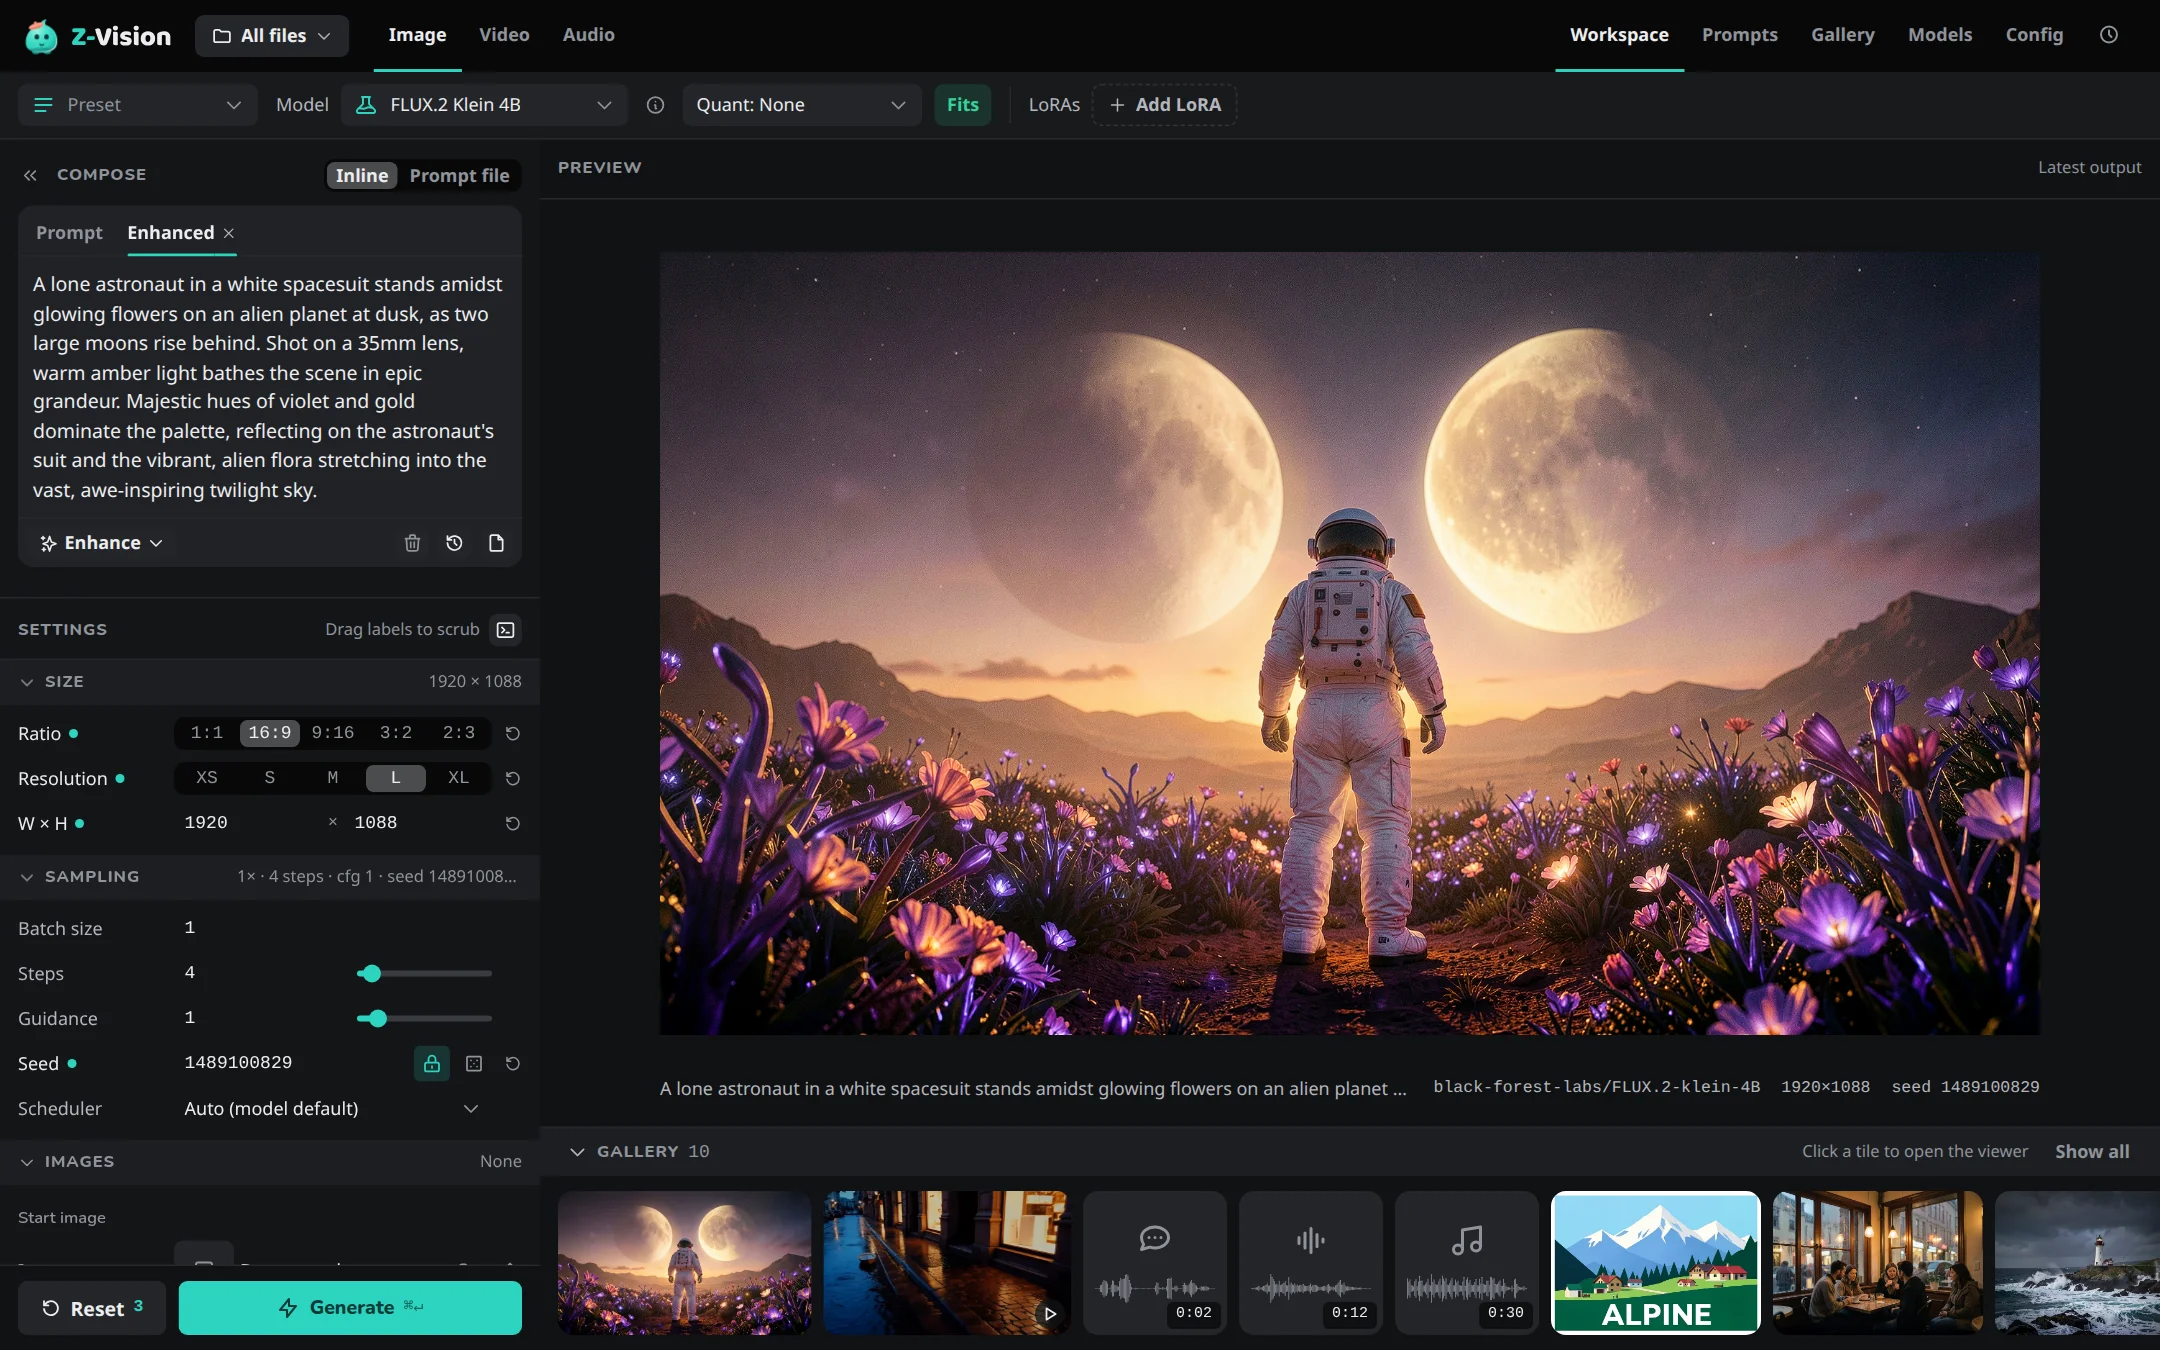
The top bar and tabs
On the Workspace the top bar has the Image, Video and Audio tabs. Image and Video each keep their own prompt, model, settings and preset, and each comes back as you left it. Audio is hidden on a computer that can't run an audio model.
Video has two kinds, chosen with Kind at the start of the toolbar: New makes a clip from text or a first frame, and Extend continues a clip you already have. Extend keeps its own prompt, model, settings, Batch size and Seed, and nothing you do in one kind changes the other. Kind is hidden on a computer that can't extend. See Make video.
Image has two kinds as well: New generates a picture, and Edit changes part of one you already have, or gives it more room (see Edit an image). Edit keeps its own prompt, model, settings, Batch size and Seed in the same way.
On a phone: the tabs are the workflow menu in the top strip, and the pages are in the menu at the top left. See Phones, tablets and other computers.
Project
The project picked in the top bar decides which files the preview, the Gallery strip and the latest image and video that Images offers show, and where new work is saved. A notice says where a result went when it is in another project. See Projects.
Model and LoRAs
The toolbar above the sidebar and the preview picks the Model for the current tab, its quantization (Quant, for models that have one) and its LoRAs. On a phone it heads the All sheet.
Each model carries a memory badge; see The memory badges.
Which LoRAs are offered, and how they are remembered per model, is in LoRAs.
Discover LoRAs
Discover LoRAs…, the last item of Add LoRA, searches your installed LoRAs, the curated list and Hugging Face; the first use of Hugging Face asks you to confirm its results. See LoRAs.
Presets
A preset saves a setup under a name. The Preset control is in the toolbar on Image and Video, each with its own list, and comes after Kind. Audio and the Edit kind of Image have none. A dot on the control shows when the form differs from the applied preset.
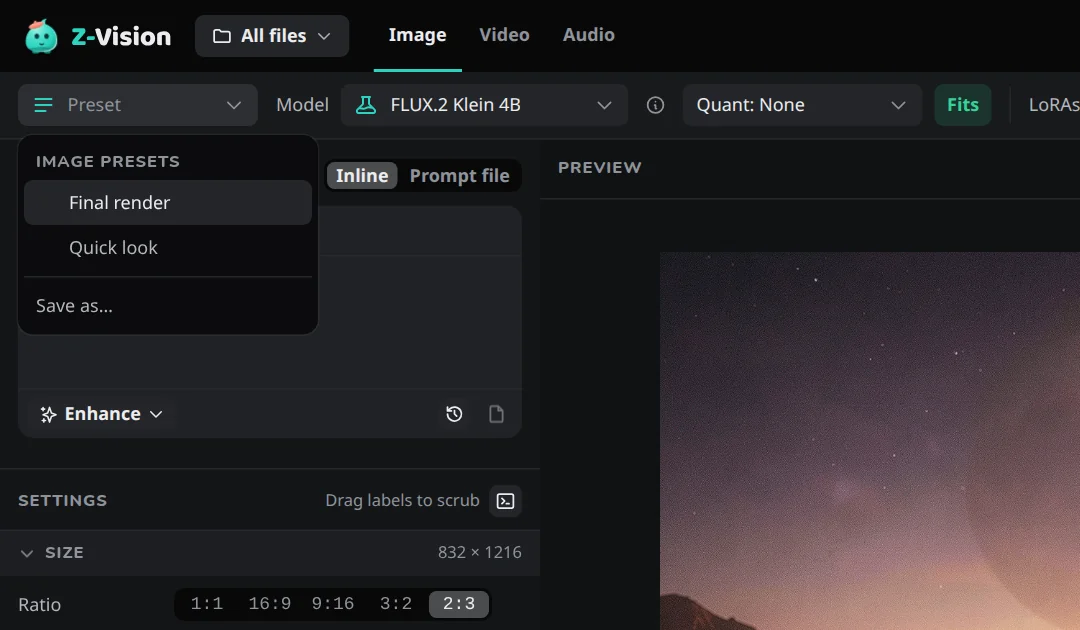
What a preset keeps and leaves alone, and where the files live, is in Save a setup as a preset. Switching between Image and Video, or between New and Extend, leaves each one's preset as it was.
On a phone: the preset is a chip in the strip under the preview, after Kind.
Compose
Compose is the top of the sidebar: where the prompt comes from, the prompt box and its tools. Writing prompts is covered in Write a clearer prompt.
Prompt source
Prompt source chooses between Inline, the prompt you type, and Prompt file, prompts from a YAML file on the machine running the server. With a prompt file, Prompts… chooses which sets and prompts run, and Edit opens the file on the Prompts page. See Run batches from prompt files.
The prompt box
For video, Compose has a Scene box above the Action box. A Negative prompt box appears for models that use one.
Generate sends, for each part of the prompt, the prompt enhancer's Enhanced text when there is any, and your own text otherwise. A video has one header and one stepper for its Scene and Action together.
- A ⚠ on the Enhanced tab means the Enhanced text is out of date, because your text or the model changed since it was written. It is still sent until you scratch it or enhance again.
- ✕ after the tab scratches the Enhanced text, so Generate sends your text again, and ‹ brings it back.
‹ 2 of 3 ›steps through the last five versions. Generate sends the version shown, and typing edits that version. Versions are kept in the browser, not on the server.
With the JSON box on, or with Enhance each image when generating on, the header is a single Prompt heading with no tabs: Generate sends the text in the box (or, for each image, your prompt rewritten as the job runs), and nothing is out of date.
The tools row under the box holds Enhance, JSON caption (Ideogram 4), Clear, Triggers, Recent prompts and Save.
- Enhance opens the Enhance panel.
- JSON caption swaps the prompt for a structured caption in a Prompt (JSON) box, and hides Enhance and Save while it is on.
- Clear empties your text, the Enhanced text and its versions (with JSON on, the JSON prompt), and a video's Scene and Action together. Undo in the line under the box brings it back until your next edit or run there.
- Triggers puts a trigger word of a LoRA in use into the prompt. See LoRAs.
- Save appends the prompt to a prompt file, with Inline only. See Save a Workspace prompt.
The Enhance panel
The ✨ button opens a popover (a sheet on a tablet or phone) with the choices that steer the rewrite. What each choice does is in Prompt enhancer, and how to use the enhancer is in Let the enhancer add detail. Reset puts every choice back to Keep; image and video remember their own choices.
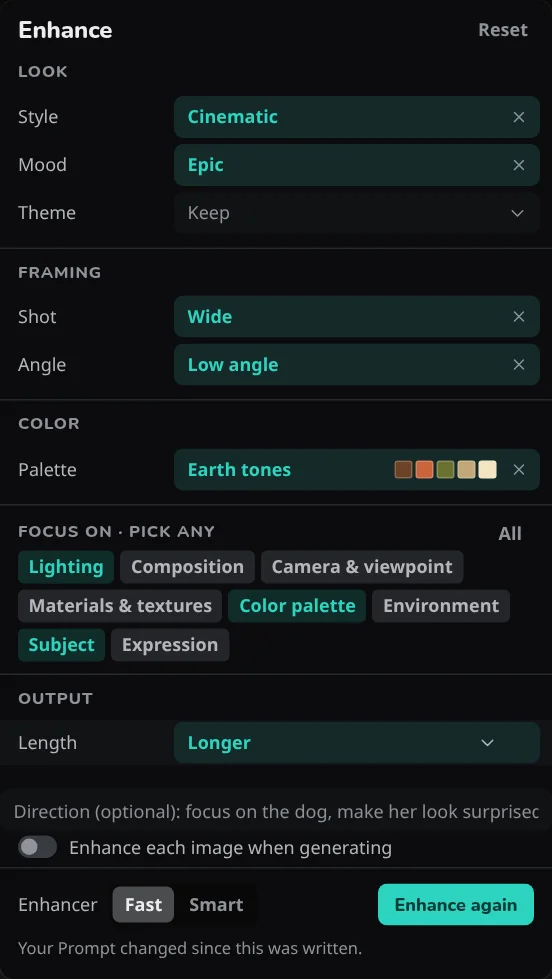
Generate waits while Enhance, a helper or Fill in is writing. While jobs run or are queued, the panel is unavailable, because the enhancer needs the same memory; enhancing inside each job still works. The first use downloads the enhancer.
Recent prompts
The 🕘 button lists the prompts you generated in the current mode, newest first: image prompts in Image, video prompts (a scene and an action together) in Video, whichever kind. The filter searches all of that mode's prompts, not only the ones shown.
- Pick a row to bring the prompt back: the prompt, a video's scene and the negative prompt go into their boxes, and any Enhanced text and its versions are dropped. Settings, model and tab don't change. JSON rows are greyed out, with the reason, on a model that takes no JSON captions.
- Clear recents removes the prompts of the list you are in, after asking. Every other list stays.
Recents are kept in the app database on the server, not in the browser, so they are the same on every device you open the Web UI from. Prompts that come from a prompt file are not recorded, and neither are refused or blank submits.
Settings
Settings holds everything else, grouped, with Copy CLI command in its header (see Copy as a command) and Reset and Generate at its foot. On a phone, a strip of chips under the preview opens each setting in a sheet; see Phones, tablets and other computers.
| Group | Has | How to use it |
|---|---|---|
| Size | Ratio, Resolution, or a custom W × H | Pick a size |
| Sampling | Steps, Guidance, Scheduler, Seed, Batch size; in Video, Duration (s), and in the Extend kind Extend by (s) and Total | Set steps, guidance and seed |
| Images | The start image, references, or a video's first and last frame. See Images | Start from an image |
| Image to edit | In the Edit kind of Image, the picture to change and its paint. See Edit an image | Edit a picture |
| Source video | In the Extend kind of Video, the clip to continue. See Source video | Extend a clip |
| Audio track | In Video, an audio file the clip follows. See Audio track | Follow an audio track |
| Upscale | Images only: the factor, Denoise, and Review before upscaling | Get a larger image |
| Post-processing | Sharpen, Contrast, Saturation and Transparent (images) | Sharpen and adjust contrast and saturation |
| Video | Audio, Low memory, and the clip's own Upscale with its factor and Review | Add sound or an audio track, Video as it's made |
Groups and rows only show when the model and tab use them.
- Change a number by typing it, or by dragging its label sideways.
- Batch size is the number of runs. Every tab and kind keeps its own.
Seed
The Seed field reads Random each run until you type a number. Lock seed reuses one seed every run, starting from the seed of the newest output in the Gallery (or a random one if there is none), so the next run starts from the last one. New random seed fills in a new number and locks it. Making variations with a seed is covered in Make variations with Reuse and a new seed.
Transparent background
Transparent in Post-processing switches on Transparent background. The Non-commercial button beside it opens the cut-out models' terms.
Images
The Images section holds every image the run uses: in Image, the start image and, on FLUX.2 Klein, references; in Video, a first frame and an optional last frame. With none, Generate works from the prompt alone. What each is for is in Start from an image and First and last frame.
- An image stays until you press its × or Reset, also after a reload. Image and Video each keep their own, and switching tabs, kinds or models clears none of them.
- An image the model can't use is hidden: not shown, not sent, not counted. It stays in the draft and comes back on a model that can use it.
- An image that Generate would use but can't find blocks Generate, with the reason above the button. See Generate is greyed out.
On a phone: one Images chip opens the same groups in a popover. See Images on a phone.
References
Models that take references offer up to four. A row's position is its number in the prompt: Reference 1 is "image 1". Removing a row renumbers the rest. Use as → Reference in the Gallery or viewer adds an image as the next number and keeps the prompt.
Source video
In the Extend kind of Video, Source video holds the clip to continue, chosen with Browse, by path, or with Extend in the Gallery or viewer. A handle on the strip of its frames sets where the extension continues from; it stops at frame 25. What a point does is in Extend from a point.
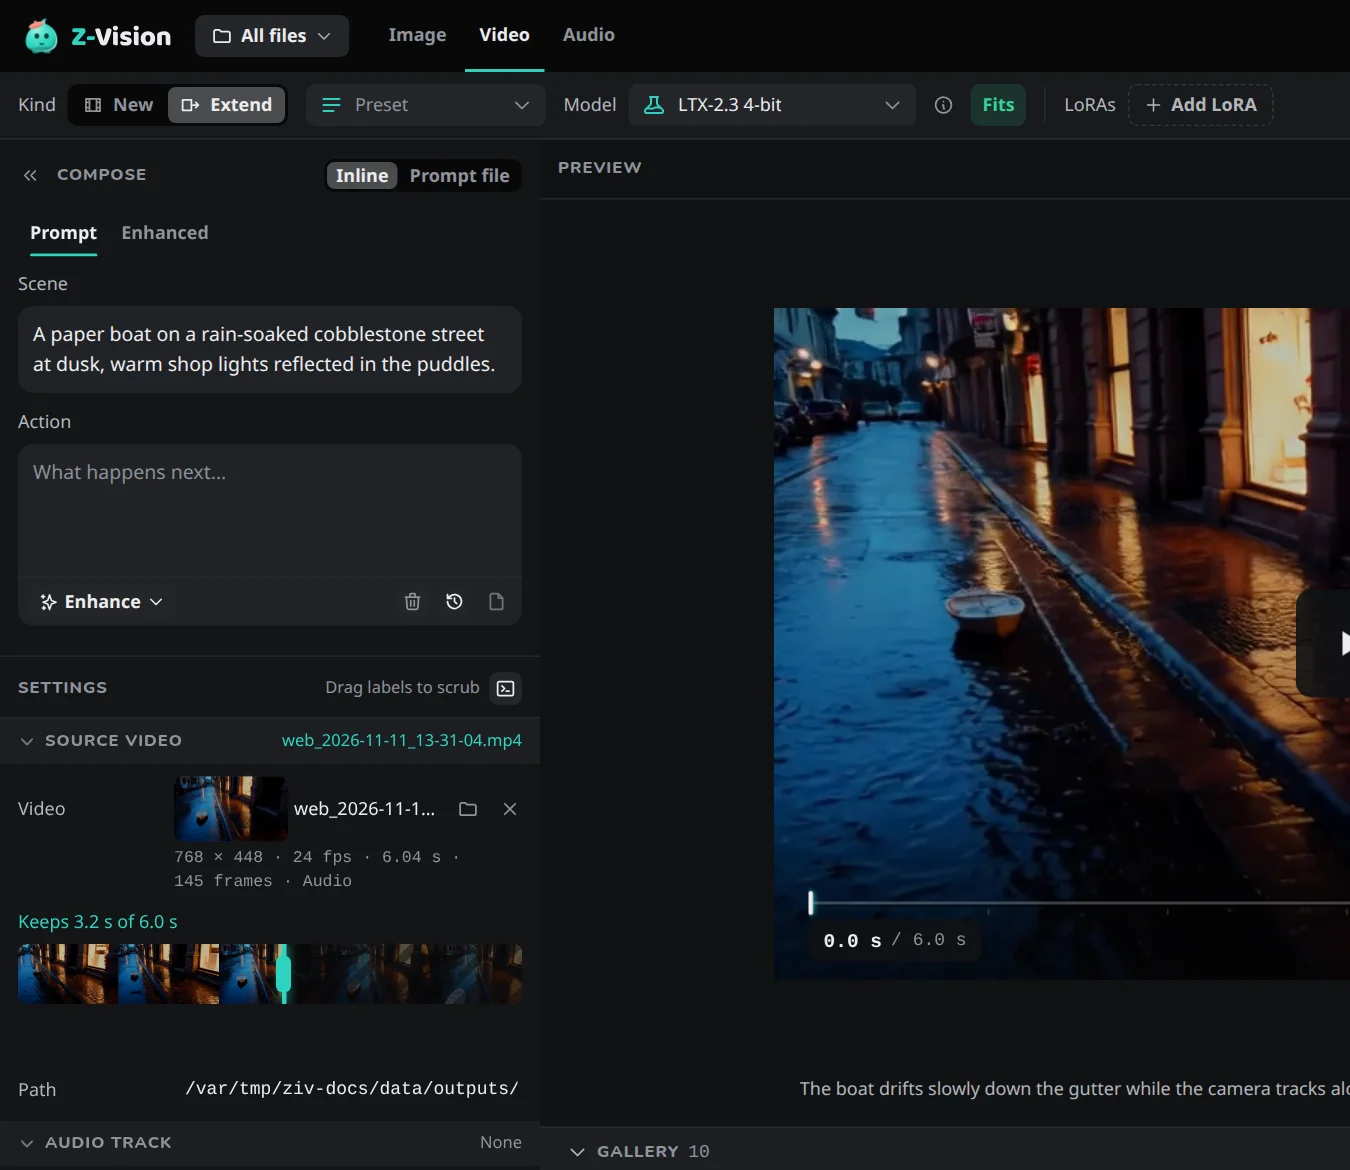
The point belongs to the source: choosing another source puts the handle back at the end, and a video paused in the viewer arrives with its point set.
Audio track
In Video, either kind, the Audio track section takes an audio file the clip follows, with Start at in seconds. See Follow an audio track. In the Extend kind, choosing a source made from a track fills in that track from where its sound ended; a track you chose yourself stays when you change the source.
Image to edit
Edit is a kind of the Image tab, chosen with Kind. It shows only the controls an edit uses, with a prompt box of its own; it has no preset, prompt file or Enhance, and offers only the models that can edit. What an edit does, and how to make one, is in Edit a picture.
Image to edit in Settings holds the picture. Empty, it is a drop zone with Browse, Upload and Latest output. With a picture chosen it shows the name and size with a × to clear it, Open painter, and one line that says what will be sent:
- Paint and the painted share of the picture, or Whole picture, from the prompt when nothing is painted;
- Extend, the side, the amount and the new size, or No side chosen yet;
- Paint the area again, after Reuse settings on a painted edit, because the paint isn't saved.
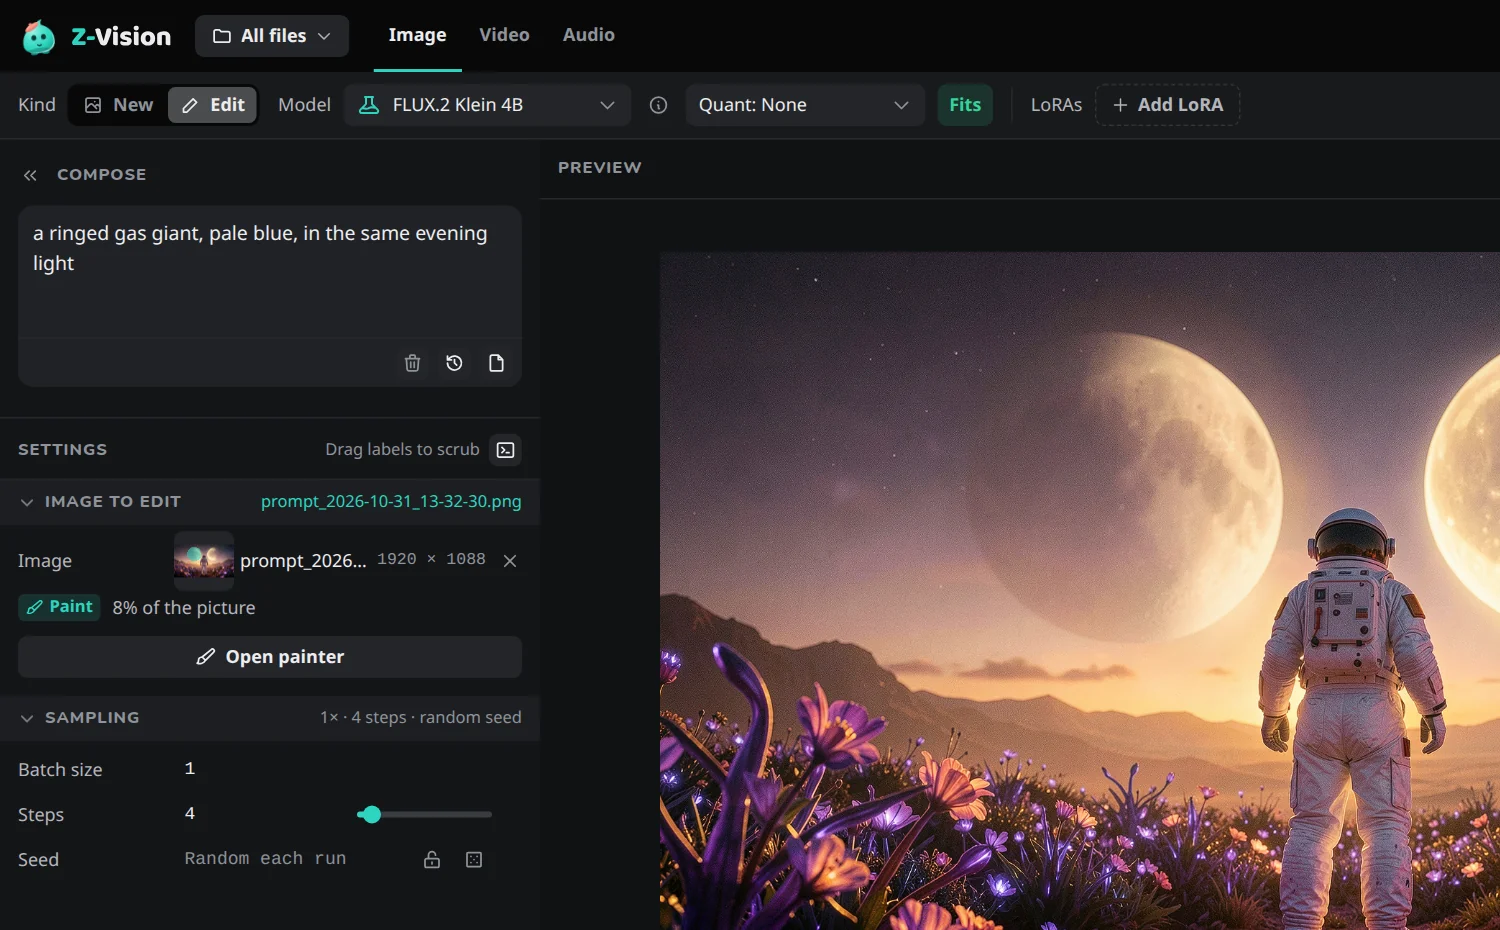
The prompt box asks What should be here? for a painted area or a new strip, and What should change? for a whole-picture edit. Generate is off with its reason shown: Choose an image to edit, Choose a side to extend, or Paint the area to change for a picture with transparent parts. Edit on a finished picture in the viewer (M) or a tile's ⋯ menu opens it here with an empty prompt.
The painter
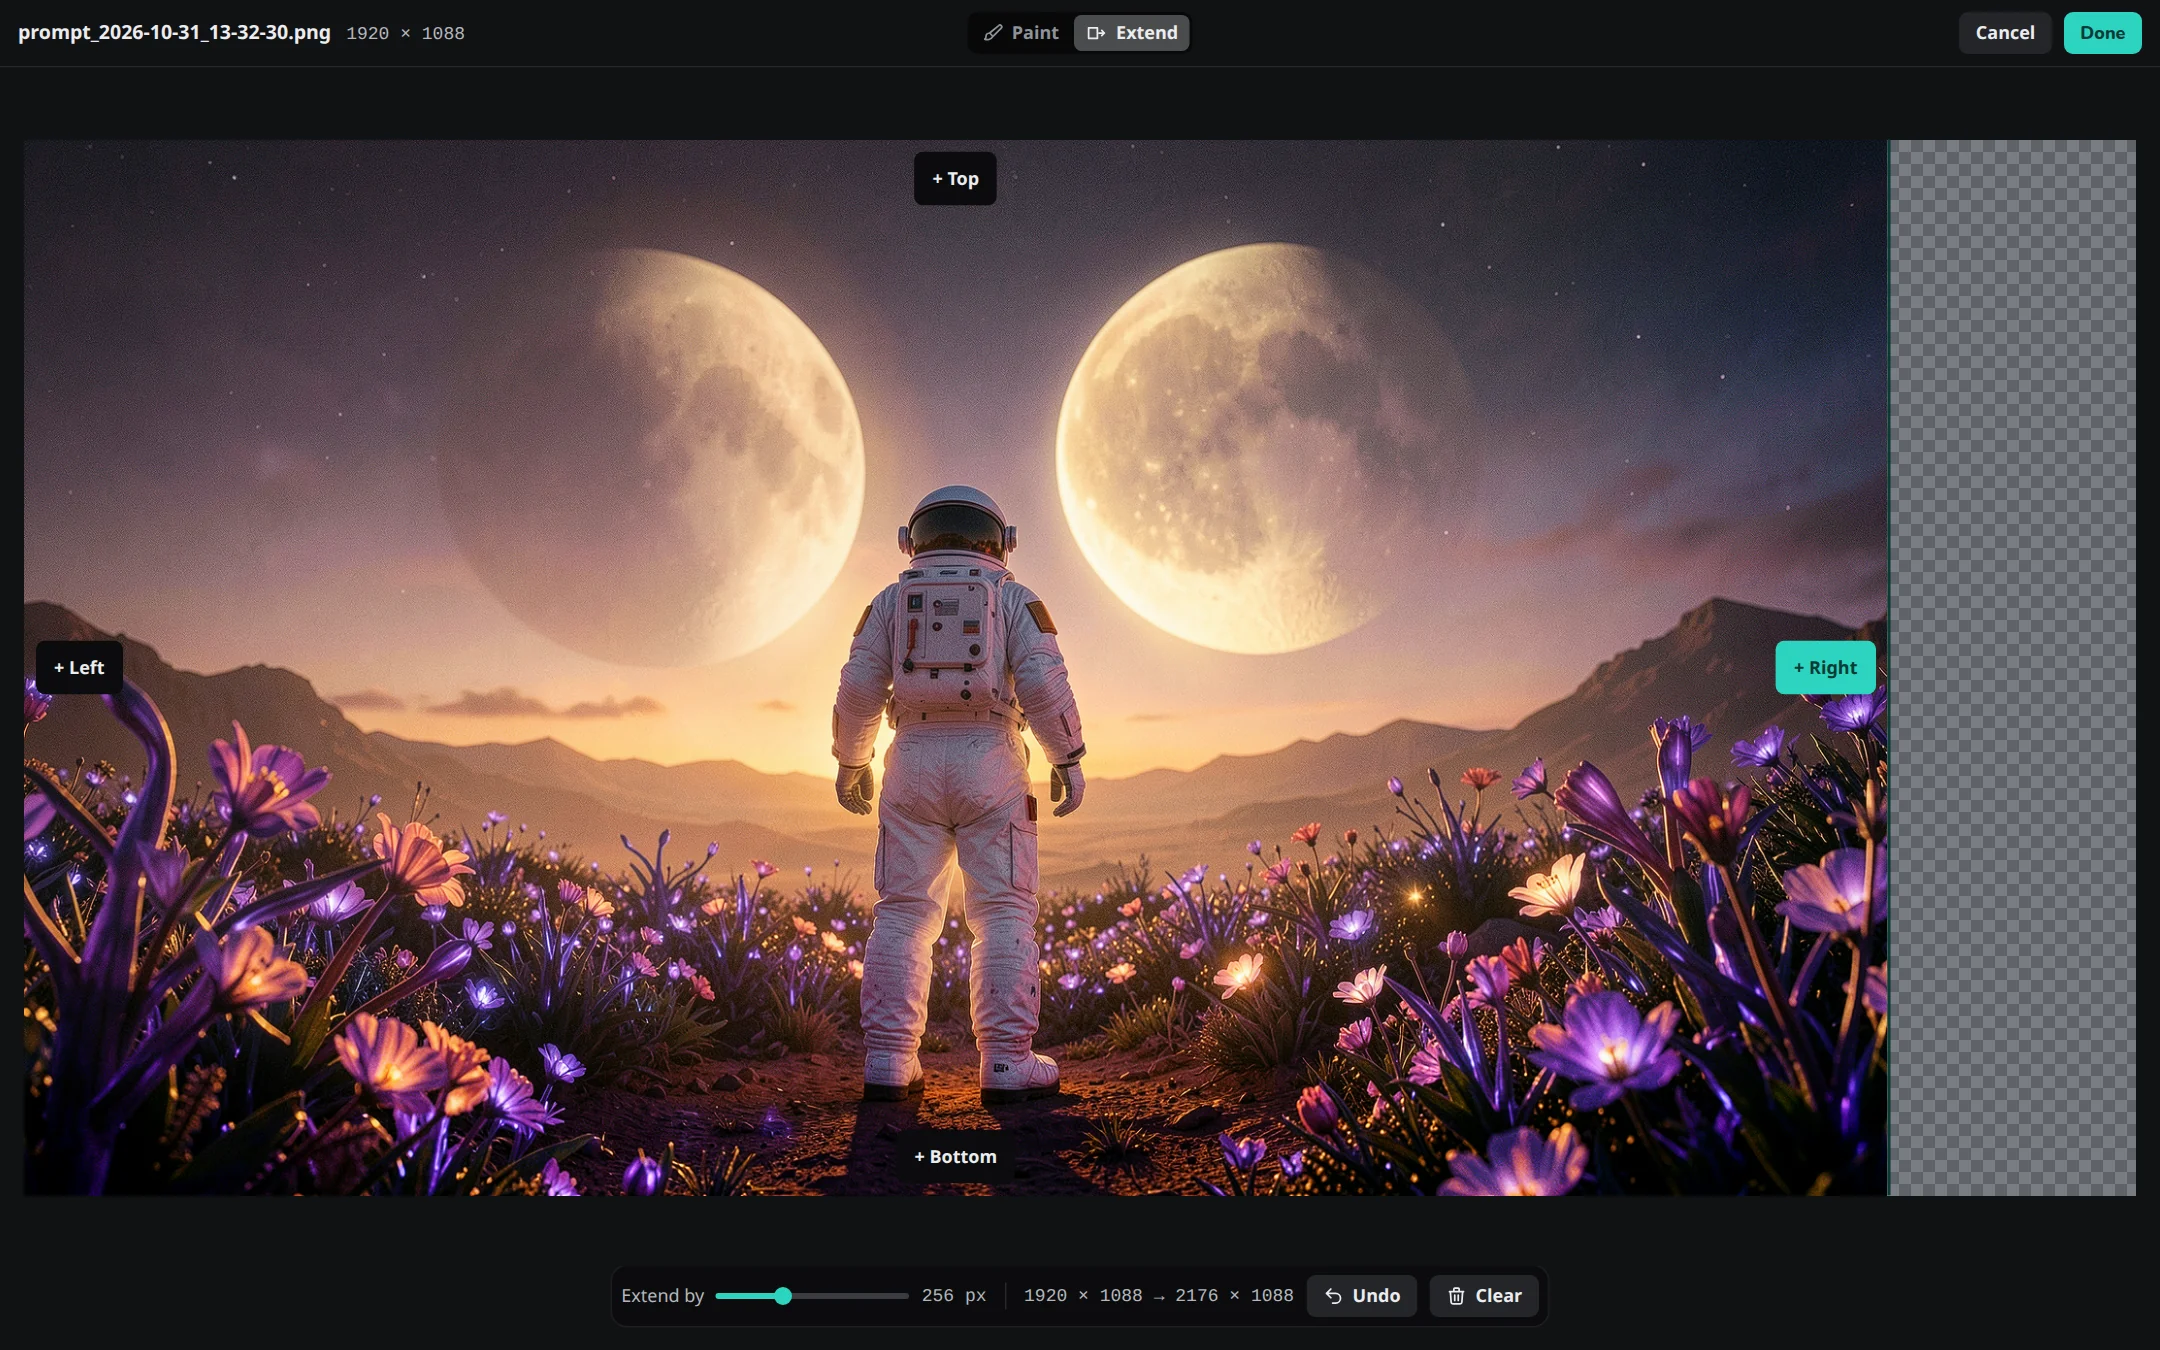
The painter fills the screen, opened with Open painter. The Paint / Extend switch sits at the top, with Cancel and Done. Done keeps the work; Cancel puts it back as it was when the painter opened, asking first if something changed.
One mode at a time. Only the active mode's work is sent. Switching removes the work of the mode you leave: the painter asks first, and Undo brings it back. 1 switches to Paint and 2 to Extend. With nothing painted and no side chosen, the prompt changes the whole picture. How to use each mode is in Edit a picture.
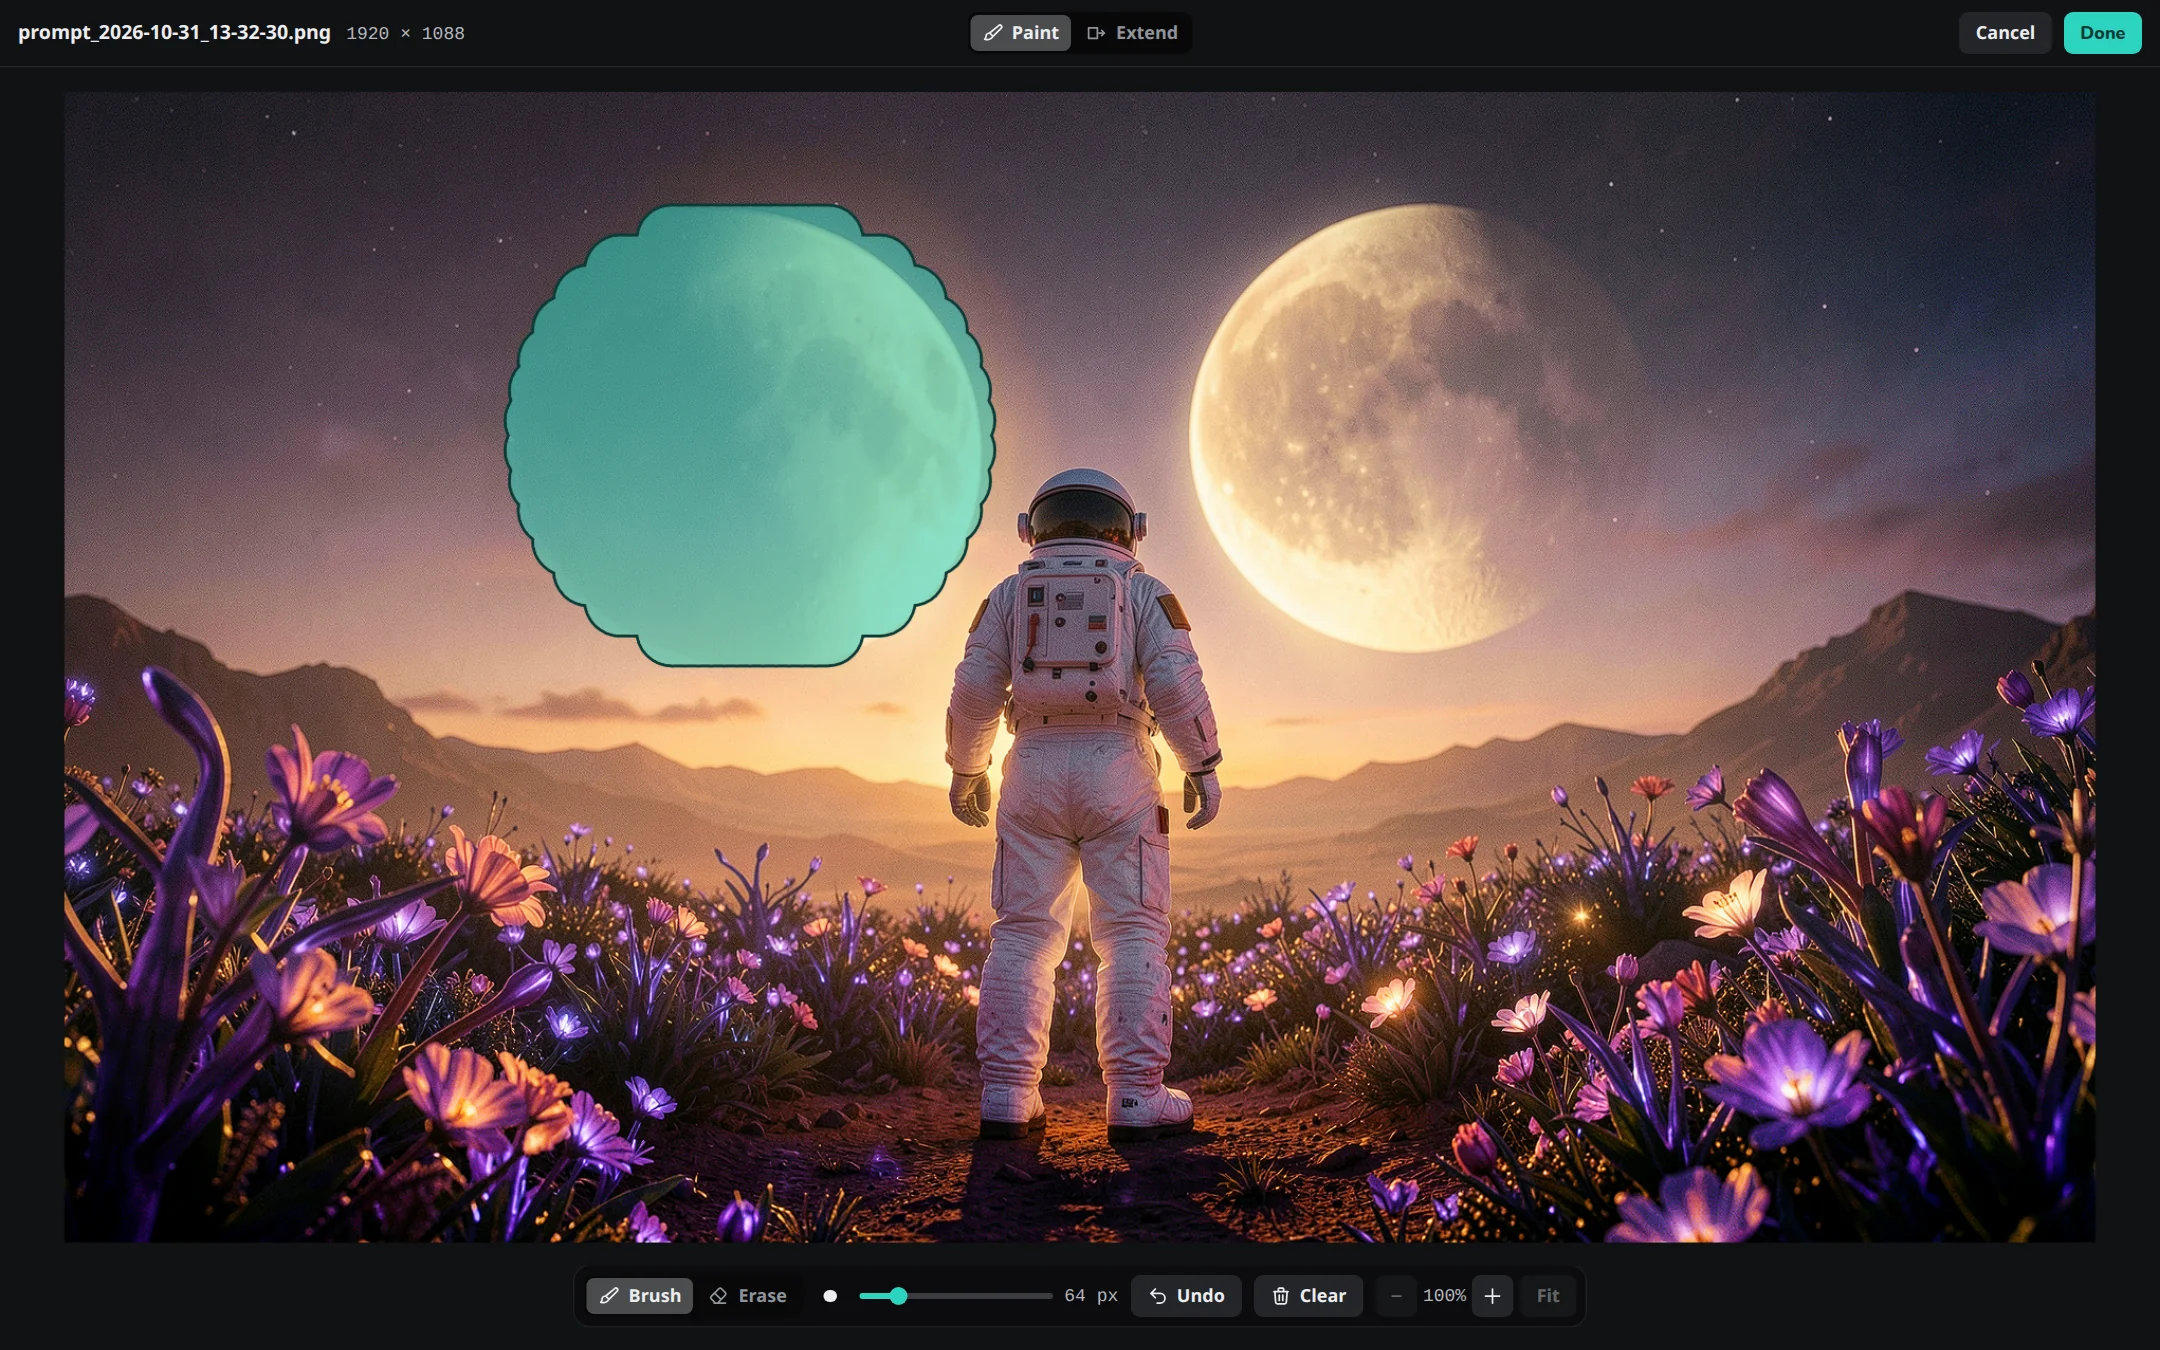
- Paint: Brush and Erase, a size slider, Undo, Clear and zoom. The painted area shows as a teal fill. Keys are in Shortcuts.
- Extend: + Top, + Right, + Bottom and + Left on the picture's edges grow one side, by Extend by 128 to 512 pixels, with the new size shown. Extend is off for a picture with transparent parts; hover the button to see why.
- Mouse and pen paint. On a touch screen one finger paints and two fingers zoom and pan.
On a phone: see Edit on a phone.
Settings are remembered
Your settings stay in the browser between visits, as long as the Web UI starts on the same port.
When you choose another model, the settings you changed are kept and the rest take the new model's defaults. A size the new model doesn't offer becomes its largest preset. Reuse settings and Load settings replace the open tab's settings instead, and leave the other tabs and kinds alone; see Reuse settings.
Reset
Reset at the foot of Settings puts the open tab or kind back to its defaults: its settings, images, audio track and Enhance options, and the applied preset is deselected. On Extend it also clears the source video and the point, and on Edit the image and its paint. It keeps the model, LoRAs, quant and prompts, and never touches another tab or kind. Every tab and kind keeps its own Batch size and Seed, and a Reset puts the open one's back. What Reset puts back on Audio is in Audio tab.
Copy as a command
The terminal button in the Settings header copies a ziv image, ziv video or ziv audio command with the current model, prompt, LoRAs and settings, writing to the folder the job would save to (the Web UI's output folder, or the picked project's). Paste it in a terminal to run the same job. A notice says when the command would do something different; an uploaded start image or reference is named by its file name, so replace it with the file's path. An edit's command names the image with --edit, and a painted one names --mask mask.png, a placeholder for the painted area saved as a PNG with the shape of the image. See Copy a command from the Web UI.
Paths on the server
Fields that take a path on the server's machine (prompt files, the output folder, checkpoints, LoRAs, images, audio tracks, source videos) have a folder button that opens a file browser inside the Web UI, so it works the same on every system and from a phone. With a project picked, an empty image, audio track or source video field opens in the project's folder. Keys are in Keyboard shortcuts.
Generate
Generate is at the foot of Settings; its keys are in Keyboard shortcuts. On a phone, press and hold Generate, or tap the arrow beside it, for Generate with a new seed.
While a job runs, Generate reads Add to queue; see The queue.
- When it can't start, the reason shows above the button. See Generate is greyed out.
- While a model or LoRA downloads, it waits for the file and starts the job when the download ends.
- When the model isn't downloaded, it asks before the download starts; Cancel queues nothing.
While a job runs
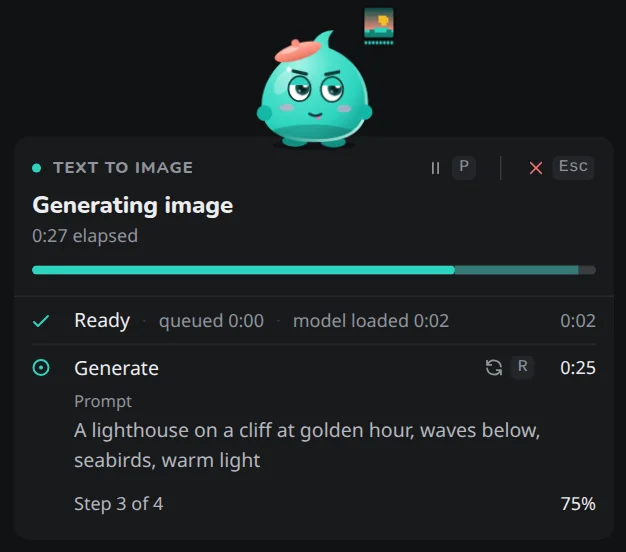
The live preview shows the current image taking shape after every step, so you can skip a bad one early. It is never saved, and a video shows none while it is made. Jobs already in the queue don't ask about downloads; they download when their turn comes. If a job fails, the card says why, and the Job log keeps the reason.
- Pause waits after the current image or video, until you resume.
- Skip stops the current image or video at its next step and moves on.
- Repeat makes the current image or video again with a new seed, once it finishes.
- Cancel stops the job at its next step. On a touch screen it asks first.
Keys are in Keyboard shortcuts; the same controls work in a terminal, see Pause, skip or stop a run. On a phone they are on the bar over the preview and in the job sheet under ⋯.
- Video: Skip and Cancel act on the video being made. Nothing is saved for it unless it was on its final step, in which case it is saved first. On a Mac, MiniMax H3 text to video can't stop in the middle of a clip, so Skip and Cancel take effect when the clip finishes, and the clip is kept.
- While prompts are rewritten: a job with Enhance each image when generating rewrites every prompt before the model loads. Skip skips the current rewrite, and that image uses your own prompt. Cancel stops the job before the model loads.
- Review before upscaling: with review on, the job waits for you to Approve or Discard the small render. A Review badge on the Workspace button shows it from the other pages.
- Cancelling a download: Cancel stops a download at once. Finished files are kept and the file in progress starts over next time. A job that only waits for a download started from the Models page is cancelled, and the download keeps going.
- Lost connection: the job keeps running, and the controls come back when the page reconnects. See Troubleshooting.
The queue
You can keep working while a job runs. Change the prompt or settings and press Add to queue.
- Queued jobs run one after another, in order, each with the settings it had when you added it.
- Each job under Up next can be removed, or its settings copied back into the form with Load settings. Clear queue removes them all after asking and never stops the running job.
- If a job fails, the next one starts anyway.
The queue is shared by every open tab, and lives in the server's memory: stopping the server clears it. A job keeps running when you close or reload the tab; reopen the Workspace and it reconnects. Batches and the queue are covered in Set runs and batch size.
The preview and the Gallery strip
With no job running, the preview shows your latest output; step through earlier ones with the arrows or a swipe, and Latest goes back.
- The batch grid. When a job that made several outputs finishes, all of them fill the preview as a grid until you step away. A batch of takes shows each as a player, one under another. Each tile has the same ⋯ menu as the Gallery. A phone goes straight back to the latest output.
- Video and takes play in the preview in the same player as the viewer. Pause a video partway to use that frame; see Use a paused frame.
Finished images, videos and audio appear in the Gallery strip, newest first. It is the same list as the Gallery page, so a new output, a delete or a move shows in both. A strip tile's ⋯ menu has Move to project…; see Move to project. Files can be starred here too. On a phone, swipe up for the Gallery.
Notices
Saves, moves and errors appear as short notices, one at a time; the next appears when you dismiss one or its time runs out. Pointing at a notice keeps it on screen.
Model-specific controls
Ideogram 4 Instant adds a JSON caption mode and a First sigma setting. It has no start image or upscale, so the Images section is hidden, and its width and height are limited to 256–2048 in steps of 16. See Ideogram 4 and Use Ideogram 4's controls.