Gallery and viewer
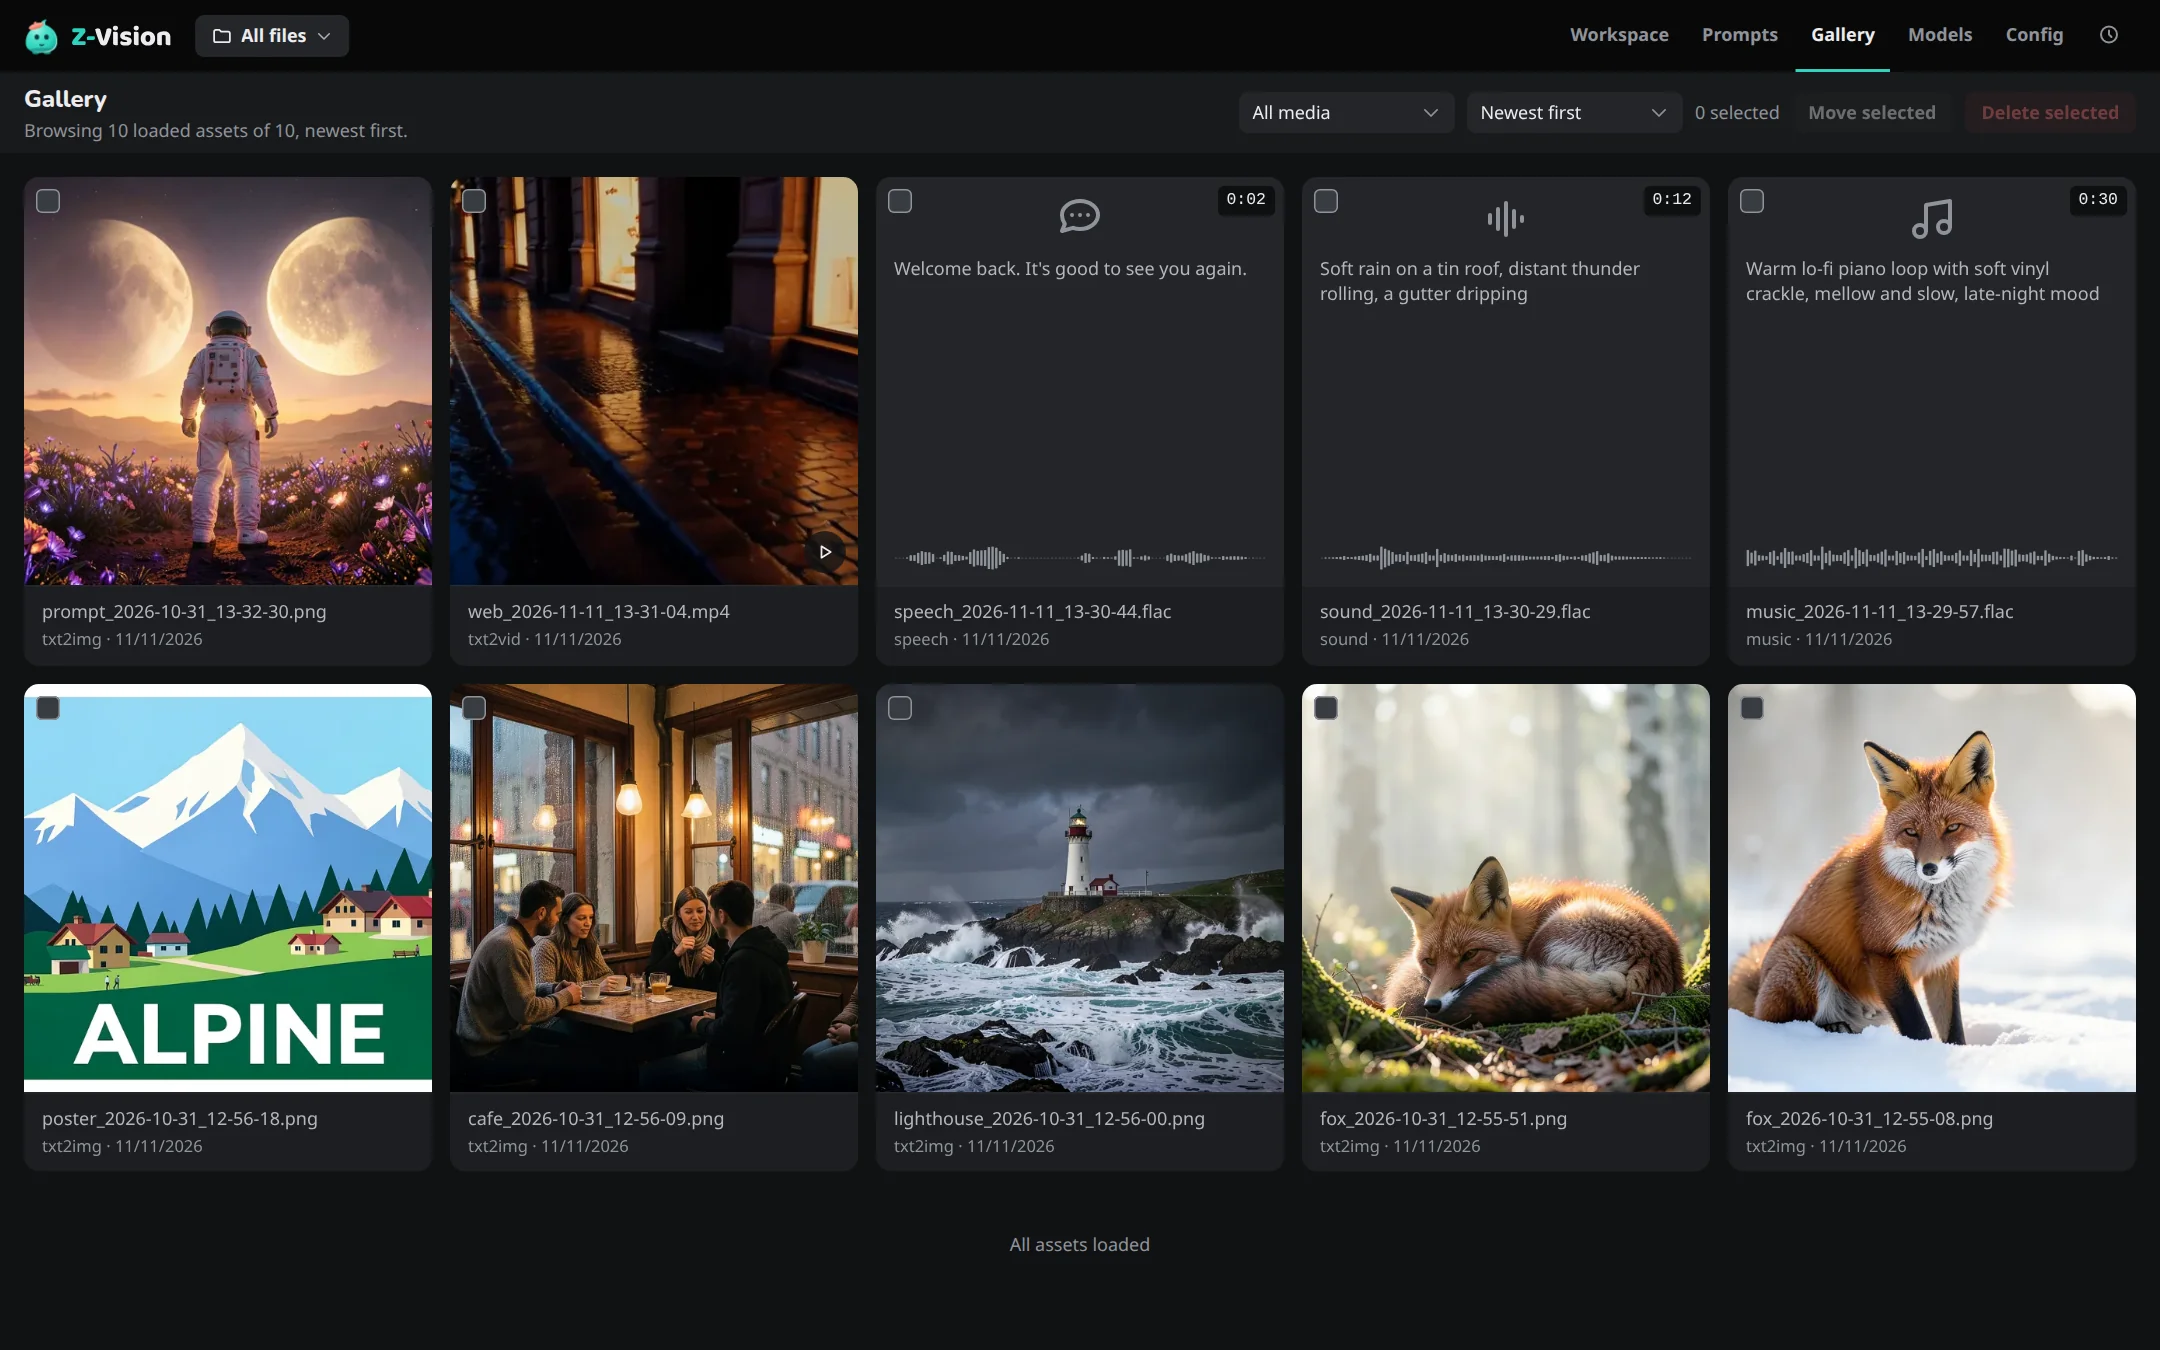
The Gallery (G G) shows every image, video and audio file in your output folder, including ones the command line made there, or just those of the project you have picked. The Workspace's Gallery strip shows the same list, so a new output or a delete shows in both. A click on a tile opens the viewer; Select mode acts on many files at once.
Browse
Filter by kind and sort by date; with All files picked, the filter also offers Not in a project. The ★ toggle beside the filter shows only starred files and combines with the filter and the project. More files load as you scroll, and coming back to the Gallery restores your place.
Each tile's ⋯ menu has the same actions as the viewer, led by Reuse settings, plus Select. Right-click a tile with a mouse, or press and hold it on a touch screen, for the same menu. Transparent images show over a checkerboard, which is only a display aid; the file holds real transparency.
On a phone: see Viewer and Gallery on a phone.
Projects
The Gallery shows the files of the picked project. Changing the project clears the selection, closes the viewer and scrolls back to the top; the filter and sort stay.
Select, move, download and delete
Select in the header, or a tile's checkbox, turns on Select mode. Outside it a click on a tile opens the viewer; inside it a click or tap picks the tile, and Shift-click picks a run. Done or Esc ends it. The keys are in Keyboard shortcuts.
Select all picks every file the filter, the ★ toggle and the project match, not only the loaded tiles. Move, Download and Delete act on the picked files, and a file that fails stays picked so you can try again. Download saves one uncompressed zip with the folders kept.
Move to project
Move to project… is in the ⋯ menu of a Gallery tile, a Workspace strip tile, the preview and the viewer, and in the viewer's toolbar as Move. The rules are in Move a file to another project.
Stars
A star marks a file you want to find again. Star it from the star in its tile's caption, ⋯ → Star or the viewer's Star button (S); the ★ toggle beside the filter shows starred files only, and unstarring there takes the file out of the list. On a tablet or phone a tile shows its star only while starred, so star from ⋯ or the viewer. Stars also work in the Workspace strip and viewer.
Stars are kept by the Web UI, so every device sees the same ones. They follow a file when you move it to another project and survive moving or renaming the output folder. A file you rename, move or delete outside the app loses its star, and a new file that takes its name shows it.
The viewer
Clicking a tile grows it into the viewer. On a computer or iPad the viewer is a panel over the page with the details beside the image; on a phone it fills the screen, see The viewer on a phone. Step through the set with the arrow keys. Zoom into an image to see its real pixels: click it on a computer, or pinch or double-tap on a touch screen.
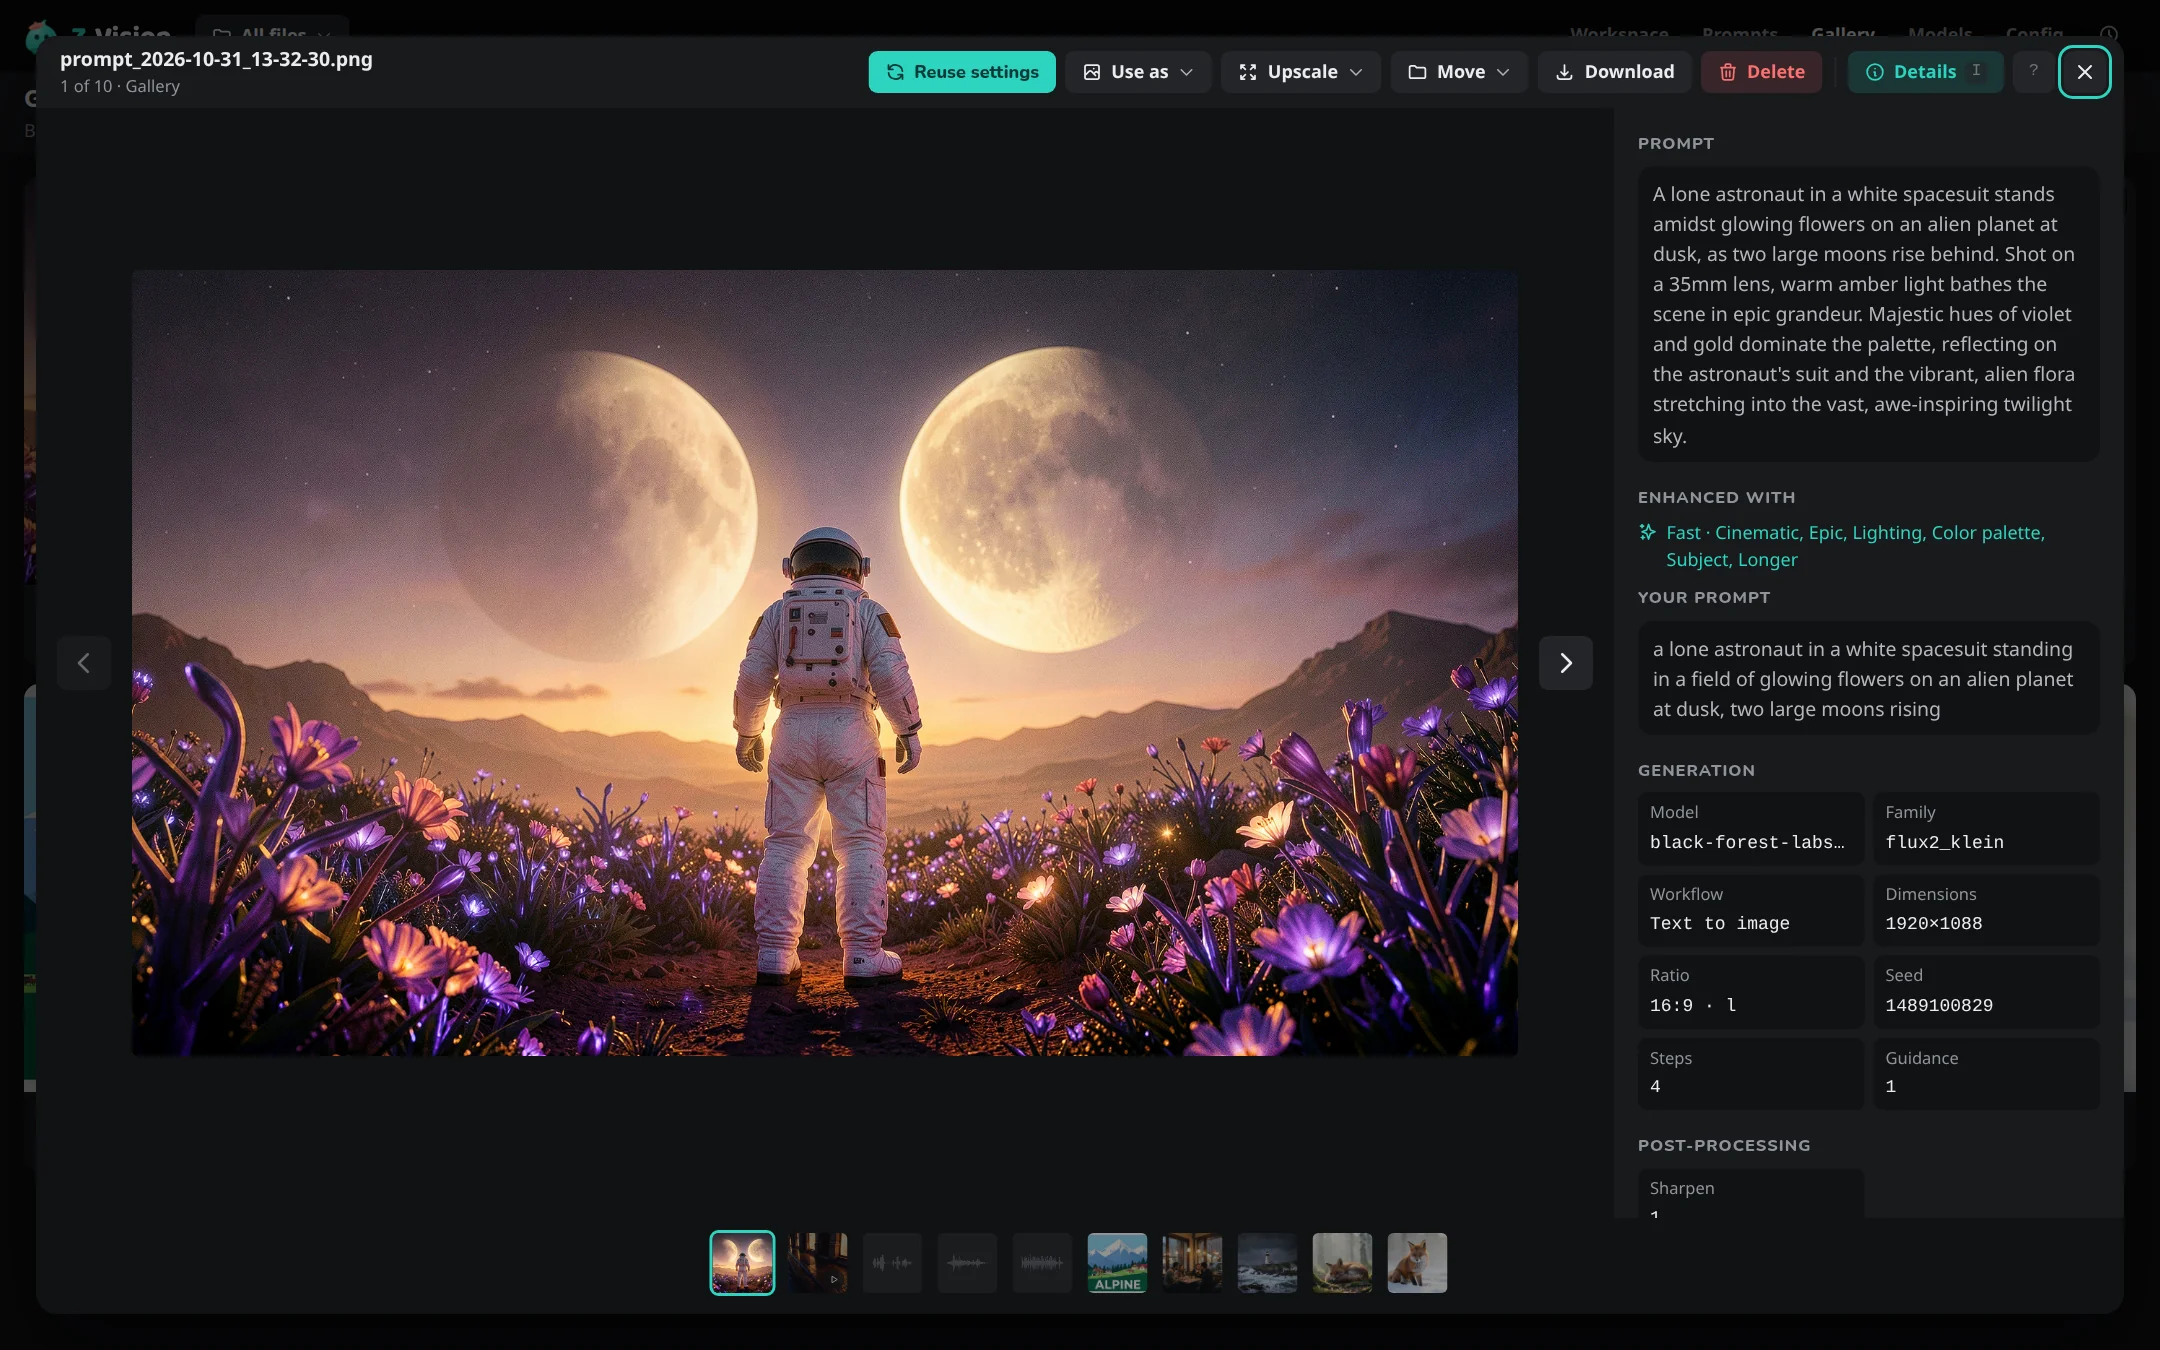
The toolbar offers Reuse settings, Use as, Extend (videos), Edit (images), Upscale, Move, Star, Download, Delete and Details, described below. Delete asks first. The keys are in Keyboard shortcuts.
Edit (M) opens an image in Image on its Edit kind, with an empty prompt and no paint. What to do next is in Edit a picture, and the screen is described in Edit an image.
The player
Video and audio play in the viewer, in the Workspace preview and in the file browser's preview. A video opens on its first frame and never plays by itself. Click or drag the timeline to seek; while dragging, move up to slow the scrub to one frame at a time. The player's keys are in Keyboard shortcuts.
Use a paused frame
Pause a video partway through to pick a frame. The time at the left of the controls becomes a menu button, such as 3.2 s / 5.0 s ⌃, in the viewer and in the Workspace preview (where the ⋯ menu offers the same choices).
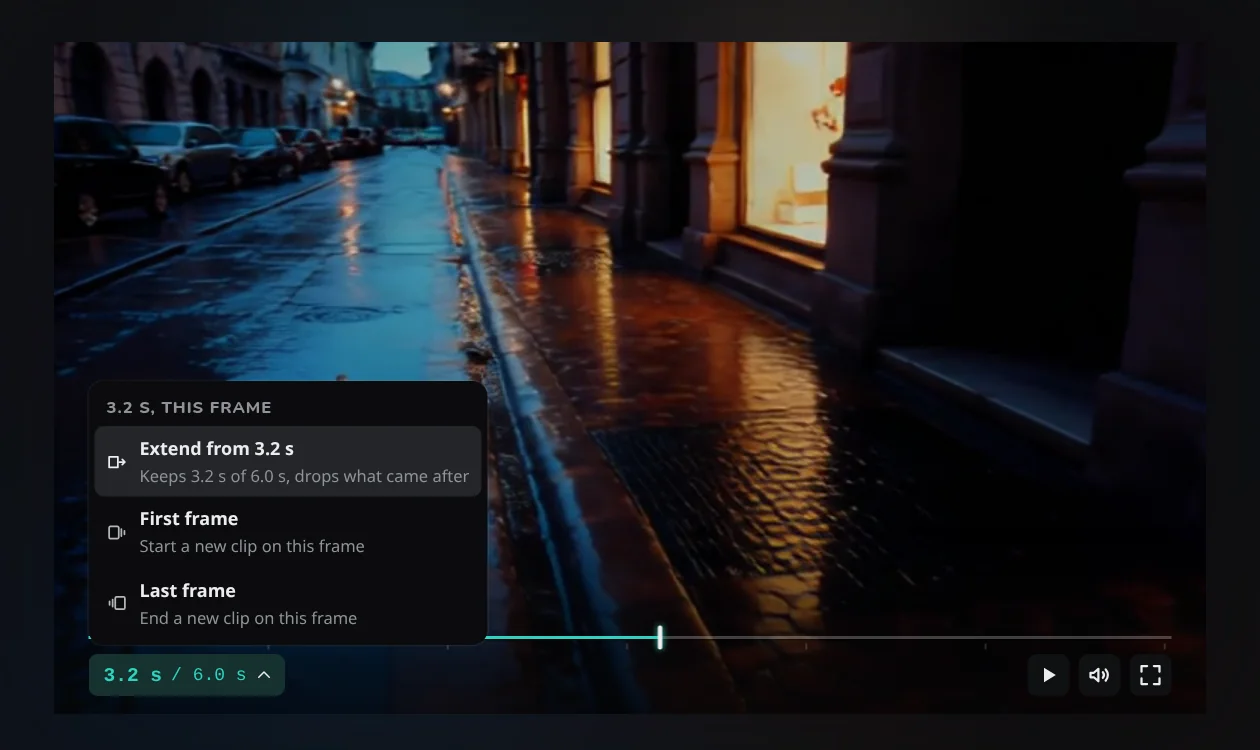
Extend from 3.2 s opens Video on its Extend kind with the clip as the source and the point at that frame. First frame and Last frame put the frame into Video as that image.
- A video at its start or playing is not a selection: Extend continues from the end of the clip.
- A video stopped at its end offers its last frame.
- A frame less than 25 frames in can't be extended from.
- A frame a model can't use is greyed with the reason.
What each one does is in Use a frame of a video and Extend from a point.
Details
Details shows how the file was made, starting with its Project. The fields are in Output files. Enhanced with shows how an enhanced prompt was made, with Your prompt under it, and Made from names the image an edit or an upscale was made from. Reuse notice lists what Reuse settings would have to change, such as an original model that isn't set up here (the default model is used instead).
Audio takes
A tile doesn't play; open it, and the viewer shows a player whose waveform is the timeline.
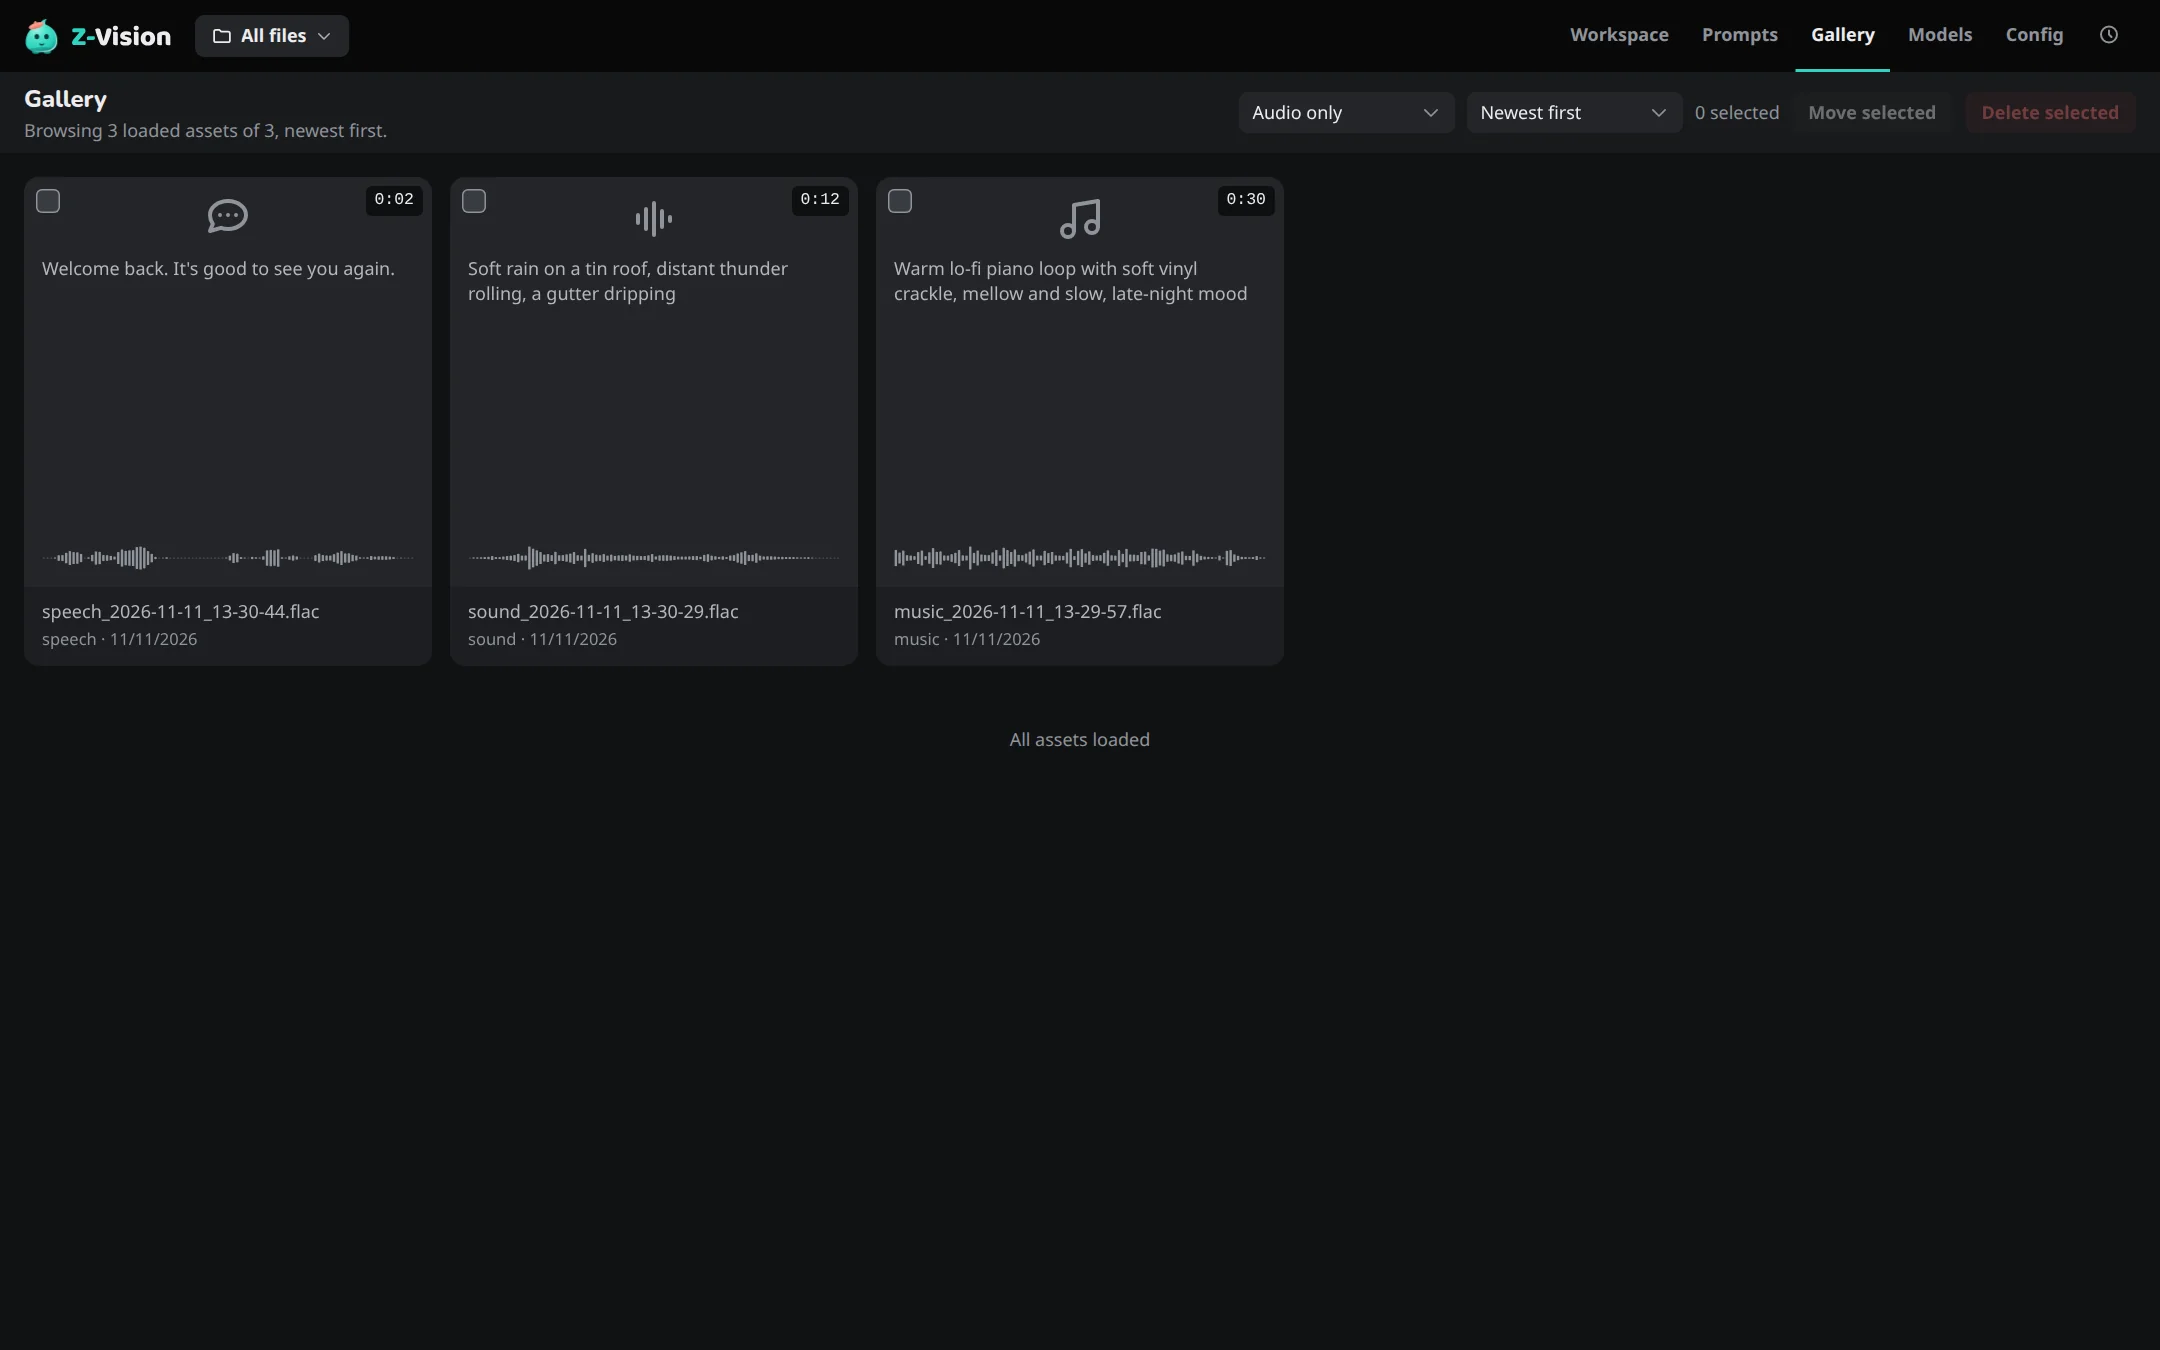
An audio file without this app's settings, such as one you copied into the output folder, plays but has no Reuse settings. What a take is and where it is saved is in Find your takes.
Reuse settings
Reuse settings loads the file's settings into the Workspace tab that made it: model, LoRAs, quant, size, seed, references and the rest. A setting the file did not record takes its default, and the open tab's settings, images, prompts, LoRAs, quant and enhance options are replaced; the other tabs and kinds stay as they are. How to use it for variations is in Make variations with Reuse.
- Post-processing, the upscale settings and Strength come back too. For an image upscaled in the viewer, only Transparent does.
- For an enhanced prompt, Prompt gets what you typed, Enhanced gets the rewrite, and the enhance options come back too.
- For a video, Scene and Action are filled. A video that was itself an extension comes back with its source.
- An edit comes back on the Edit kind with the same image, prompt and settings. The paint isn't saved, so the Workspace says Paint the area again.
- For audio, it opens the Audio tab on the take's kind with the settings it was made with. A setting the take did not set, such as a song made without a Tempo, comes back on Auto.
Use as
Use as changes only what it names. For an image it opens the Images section of the Workspace in the slot you choose; how each slot is used is in Start from an image, references and First and last frame.
- Start image puts the prompt in the Prompt box. The text of Video stays as it was.
- Reference adds the image as the next reference; the prompt and everything else stay as they are.
- First frame puts the prompt in Scene, since it describes the first frame, leaving Action empty.
- Last frame needs a first frame too before Generate works.
A target the model it opens on can't use is greyed, with the reason beside it. The arrow keys still stop on a greyed item so you can read why.
Use as an audio track or a voice
On an audio take, Use as offers Audio track, which opens Video with the file as the clip's audio track (see Follow an audio track), and, for speech takes, Voice, a one-off recording in Audio on Speech, and Saved voice, which saves the take in Your voices. A take that followed a recording or a saved voice also asks for the consent tick. Both voice items are greyed for a take longer than 30 seconds. See Use a take as a voice.
Upscale menu
Upscale is in the viewer's toolbar and in a tile's ⋯ menu. Each item starts a job that runs in the Workspace or joins its queue. What the options do, when one is missing and what they cost in memory is in Upscaling.
An image
The menu offers 2× and 4×, and 2× creative and 4× creative where the image's model can refine. What each does and where the result is saved is in Upscaling a finished image.
A video
The menu offers one item, which makes a 2× copy. Which clips have it, what the markers beside a size mean and how it differs between macOS and Windows or Linux is in Upscaling a finished video.